My Windows Terminal setup
I’m a big fan of the command line.
I know it comes with a steep learning curve, discoverability isn’t great and there’s almost no visual clues as to what you can do in the current environment. But for simple tasks, where immediate responses are valued or tasks that benefit from automation, the command line can’t be beat. Using the command line in Windows has always been hampered by the abysmal interaction provided in the default terminal provided by windows, but in May 2019 the new Windows terminal went into beta, and I’ve been a happy user ever since then, switching over from ConEmu.
Introduction
To work with a command line you need two things: A terminal and a shell.
- Terminal
- The application that handles user input and shell output and renders it on your screen. A terminal application can host a number of shells.
- Shell
- The application that interfaces with your operating system and the network. It let’s you perform actions using commands and usually some kind of scripting language. A shell can live within a number of terminals.
So when working in the command line you have to choose a terminal to provide an interface between you and the shell, and a shell to provide and interface between your typed commands and your OS/Computer. For Windows people the distinction between a shell and a terminal can be a little fuzzy, since Windows itself only surfaces the shell when you go to the Start menu and search for command prompt (DOS) or Powershell, these shells actually run in a terminal application so old and hidden it doesn’t have a name - it’s only known as conhost.exe, and starting a command window (using cmd.exe as shell) will actually launch conhost.exe hosting cmd.exe as shell, whereas starting Powershell using the installed shortcut will start conhost.exe hosting powershell.exe as shell.
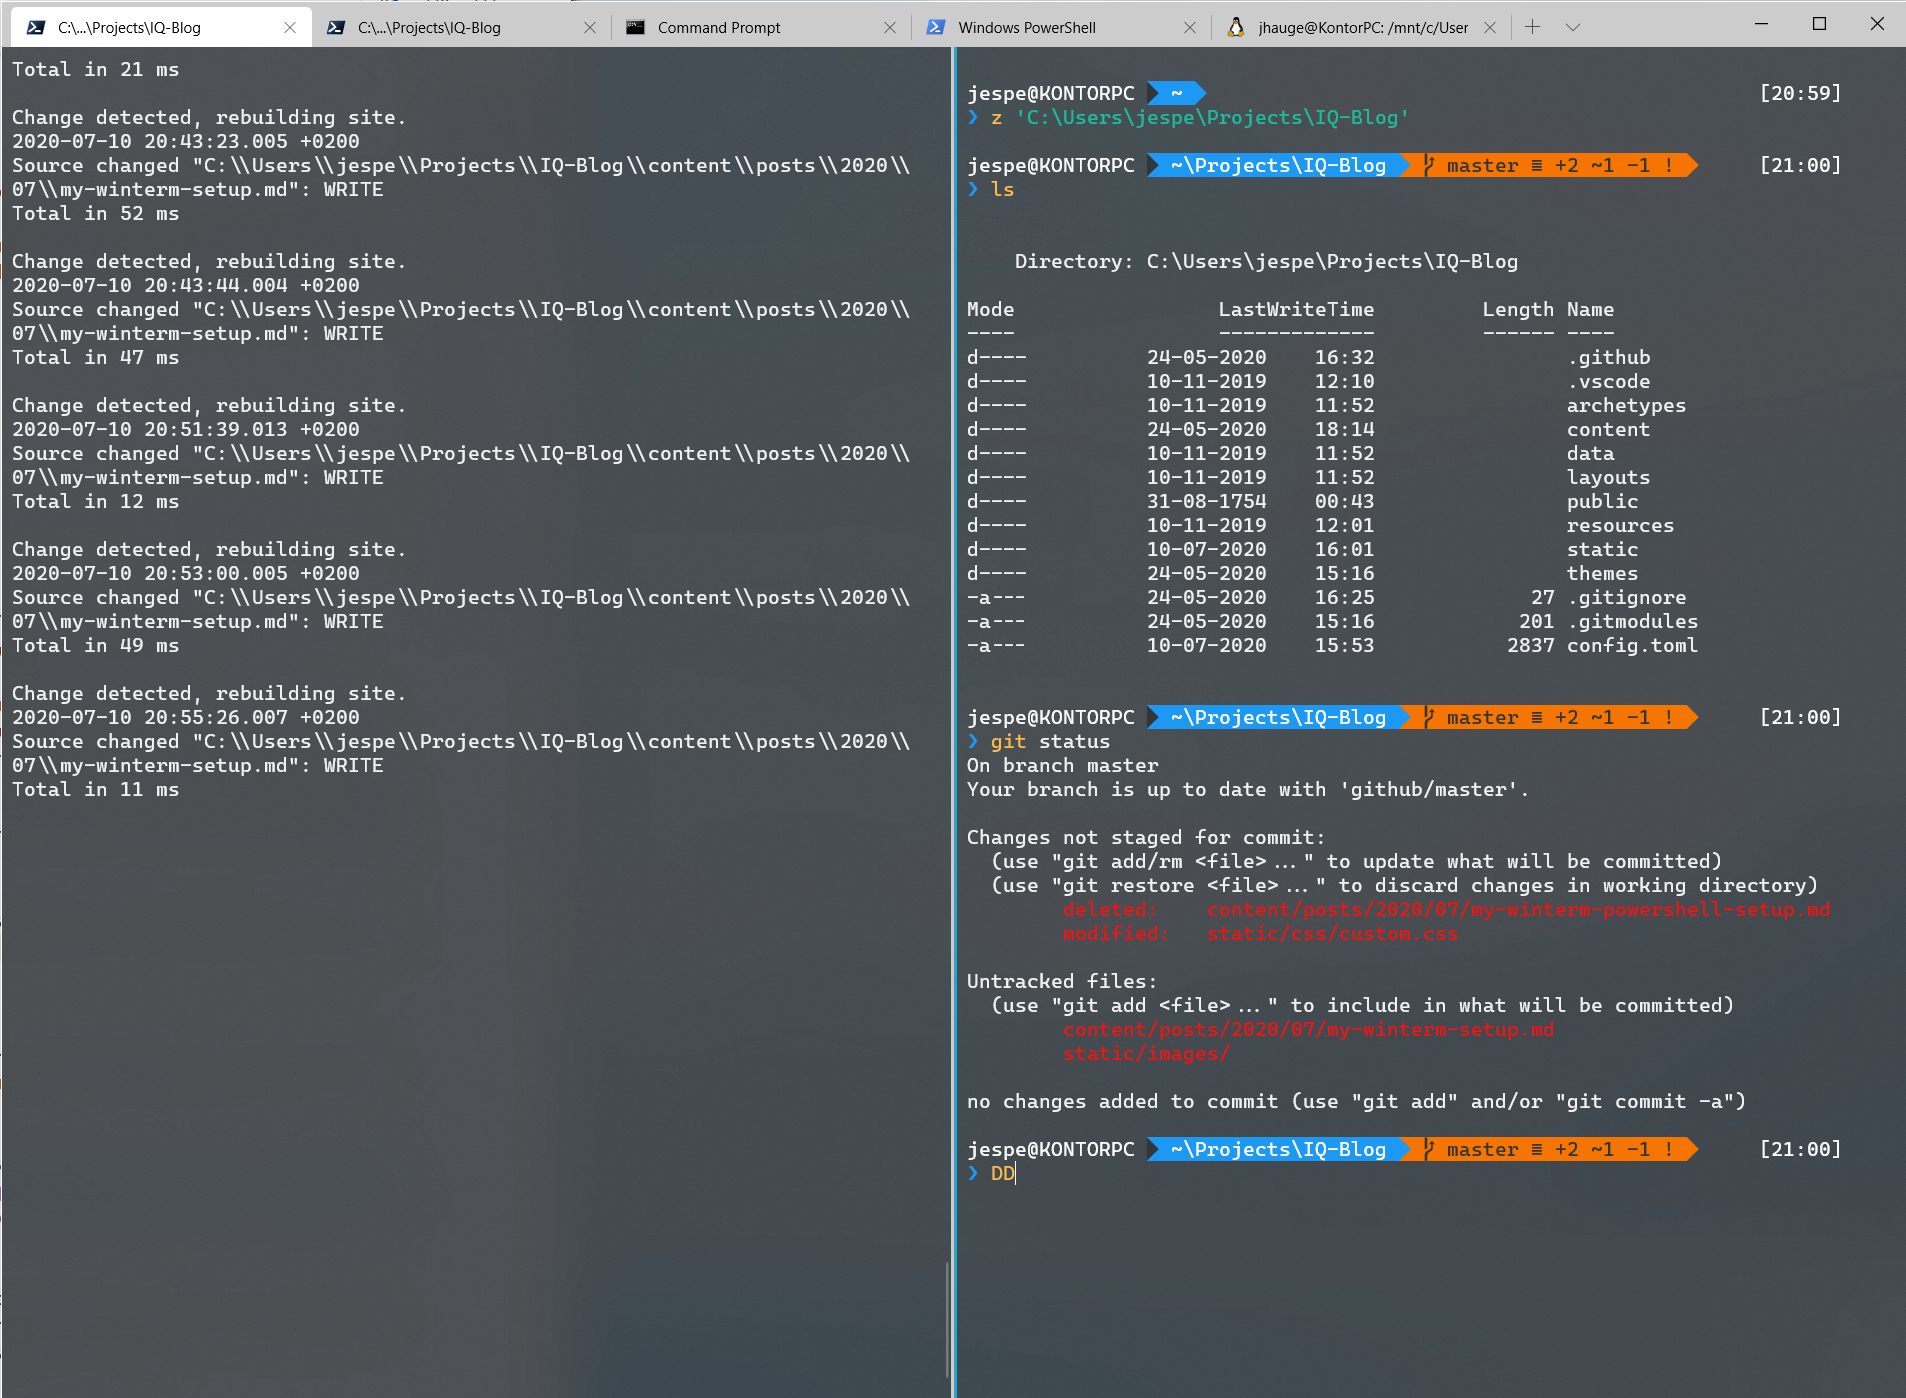
My favorite things about using Windows Terminal (and before that ConEmu), is the ability to open multiple tabs with different shells doing different stuff in different locations, the ability to customize fonts, colors and keybindings, the ability to create panes that let’s me see more than one shell at the time and switch easily between the tabs:
Windows Terminal
To use Windows Terminal you first have to get it onto your machine. The GUI way of handling that is to get it using the Windows Store - just search for “Windows Terminal” and click on to install, and the commandline way could be to install using Chocolatey: choco install microsoft-windows-terminal.
When you install Windows terminal, it will automatically pick up shells already present on your machine, so when you run it the first time there will be a number of shells you can open, by clicking the “down chevron” to the right in the tab area. If you install new shells like Ubuntu or Debian they will be added automatically.
Windows terminal is not an application you will use tons of time on tinkering with, it’s an interface to your shell, and basically you only need to configure 3 areas:
- The shells you want to use
- The look of the shells you’re using
- Keyboard shortcuts you want available
All configuration for Windows Terminal is contained in a single settings file in json format, you get can get access to it by pressing Ctr+, from a Terminal window or by selecting “Settings” from the dropdown menu, it will open in your default json editor.
Shells
As mentioned above, Windows Terminal will automatically add each shell it finds on your system to the chevron dropdown menu to the right, but you can add alternative setups if you want by going into the settings file and adding profiles to the profiles list.
![]()
A profile is a configuration for a shell, and you don’t have to limit yourself to the dynamically added profiles, you can add your own definitions for at profile, for instance you can create another Powershell profile that opens without your default profile script (see below) by adding a profile to the profiles array looking like this:
{
    "profiles": {
        "list": [
            {
                "guid": "{3caaa324-a48c-49ef-bfb6-85a9571ef735}",
                "name": "PS - no profile",
                "commandline": "pwsh.exe -nop"
            }
        ]
    }
}
This instructs Terminal to create create a tab running pwsh.exe adding the -nop parameter that makes Powershell start without loading a profile script.
So if you can create your shell with a special setup using it command line parameters, you can create virtually any shell setup you want. See below for an example of adding a Visual Studio Developer command prompt to Windows Terminal.
Each profile needs a guid, and you can use a profile guid for selecting your default shell, the shell that opens when you start Windows Terminal, or create a new tab using ctrl+shift+t. Set your default shell using the defaultprofile property in the settings file:
{
    "defaultProfile": "{574e775e-4f2a-5b96-ac1e-a2962a402336}"
}
Shell looks
Shell looks can by customized using the configuration options for shell profiles and using custom color schemes you add to the schemes array in the settings file.
First you’d want to configure some default settings used by all shell profiles like font, font size and maybe the window opacity, if you’d like a semi transparent command line terminal.
{
    "profiles": {
        "defaults": {
            "fontFace": "Cascadia Code PL",
            "fontSize": 12,
            "acrylicOpacity": 0.82,
            "useAcrylic": true
        }
    }
}
There is a number of default color schemes in Windows Terminal, but I use a couple of themes gleaned from the interwebs - set up in my winterm settings file like so:
{
    "schemes": [
        {
            "name": "BluLoco",
            "cursorColor": "#000000",
            "selectionBackground": "#D1AEAE",
            "background": "#F7F7F7",
            "foreground": "#2A2C33",
            "black": "#CBCCC5",
            "blue": "#1E44DD",
            "brightBlack": "#ABADC5",
            "brightBlue": "#1085D9",
            "brightCyan": "#5B80AD",
            "brightGreen": "#34B354",
            "brightPurple": "#C00DB3",
            "brightRed": "#FF284B",
            "brightWhite": "#1D1D22",
            "brightYellow": "#B89427",
            "cyan": "#1F4D7A",
            "green": "#21883A",
            "purple": "#6D1BED",
            "red": "#C90E42",
            "white": "#000000",
            "yellow": "#D54D17"
        },
        {
            "name": "Breeze",
            "cursorColor": "#FFFFFF",
            "selectionBackground": "#CCCCCC",
            "background": "#31363B",
            "foreground": "#EFF0F1",
            "black": "#31363B",
            "blue": "#1D99F3",
            "brightBlack": "#7F8C8D",
            "brightBlue": "#3DAEE9",
            "brightCyan": "#16A085",
            "brightGreen": "#1CDC9A",
            "brightPurple": "#8E44AD",
            "brightRed": "#C0392B",
            "brightWhite": "#FCFCFC",
            "brightYellow": "#FDBC4B",
            "cyan": "#1ABC9C",
            "green": "#11D116",
            "purple": "#9B59B6",
            "red": "#ED1515",
            "white": "#EFF0F1",
            "yellow": "#F67400"
        }
    ]
}
Don’t get confused by my setting "black": "#CBCCC5" in the BluLoco theme. It might seem like I’m defining black as a fairly light color, which is odd, but this theme is a light theme, and for historical reasons the terminal settings are named after the original colors of a terminal. So defining a light color scheme is basically done by defining dark colors like black as light colors and vice versa.
I like to use Breeze for my go-to shell, and some other themes for alternative shells I rarely use, just to make sure I’ll know when I’m in unfamiliar territory. So I set up my shells like this.
{
    "profiles": {
        "defaults": {
            "colorScheme": "Breeze",
            "fontFace": "Cascadia Code PL",
            "fontSize": 12,
            "acrylicOpacity": 0.82,
            "useAcrylic": true
        },
        "list": [
            {
                "guid": "{574e775e-4f2a-5b96-ac1e-a2962a402336}",
                "name": "PowerShell",
                "source": "Windows.Terminal.PowershellCore"
            },
            {
                "guid": "{61c54bbd-c2c6-5271-96e7-009a87ff44bf}",
                "name": "Windows PowerShell",
                "colorScheme": "Campbell Powershell",
                "useAcrylic": false,
                "commandline": "powershell.exe"
            },
            {
                "guid": "{0caa0dad-35be-5f56-a8ff-afceeeaa6101}",
                "name": "Command Prompt",
                "colorScheme": "Campbell",
                "useAcrylic": false,
                "commandline": "cmd.exe"
            },
            {
                "guid": "{b453ae62-4e3d-5e58-b989-0a998ec441b8}",
                "name": "Azure Cloud Shell",
                "source": "Windows.Terminal.Azure"
            },
            {
                "guid": "{2c4de342-38b7-51cf-b940-2309a097f518}",
                "name": "Ubuntu",
                "colorScheme": "BluLoco",
                "source": "Windows.Terminal.Wsl"
            }
        ]
    }
}
The order of the shell profiles determines the order you’ll see in the chevron dropdown menu.
If Windows Terminal keeps creating a shell profile (see dynamic profiles) and you don’t want to see it in the menu, you can hide it by adding "hidden": true to the profile object.
Key bindings
Windows terminal comes with a set of default key bindings that you can customize in the keybindings array in the settings file. These are my favorite out-of-the-box bindings:
- Open dropdown
ctrl+shift+space- Opens the chevron dropdown and lets you use arrow/enter key to select and open new tab with selected shell
- Duplicate tab
ctrl+shift+d- Creates a new shell tab using same profile as the one you’re currently using
- New default tab
ctrl+shift+t- Creates a new shell tab using your default tab profile
- Split pane
alt+shift+d- Split the current pane in half and create a new using the default profile
- Move pane focus
alt+shift+arrow[up|down|left|right]- Moves the input focus to the pane in the direction of the arrow you use
- Copy selection
ctrl+c- Copies selected text (this was added fairly late). If you set
"copyFormatting": truein your settings file it will even copy with formatting - Paste
ctrl+v- Pastes clipboard content at cursor - might seem obvious but try doing this in conhost.exe
If you want you can create/overrule the default key bindings in the settings file, I haven’t found any compelling reasons to do it though.
Recreate your settings
Since Windows Terminal is evolving (fast), you might want to delete and recreate your settings from time to time, since this will update the settings file to a more recent format with new possibilities.
I usually do this by copying the existing file into a new file, and delete the existing settings file, then close and restart Windows terminal and a new file has been created, where you can paste the parts of the old settings you want to keep.
This is necessary because Windows Terminal doesn’t have a hierarchical settings setup (yet), where you can keep your own settings apart from the default settings.
If you want you can check out my winterm settings file on github.
Visual Studio Developer Powershell prompt
If you from time to time need to access the Visual Studio Powershell prompt you can add a profile for the VS prompt to the profile list by adding this json-blob to the profiles array in the settings
{
    "name": "VS Dev PS",
    "background": "#000000",
    "backgroundImage": "C:/Users/jespe/OneDrive/Billeder/vs-logo.png",
    "backgroundImageStretchMode": "none",
    "backgroundImageAlignment": "topRight",
    "icon": "ms-appx:///ProfileIcons/{61c54bbd-c2c6-5271-96e7-009a87ff44bf}.png",
    "commandline": "powershell.exe -noe -c \"&{Import-Module \"\"\"C:/Program Files (x86)/Microsoft Visual Studio/2019/Professional/Common7/Tools/Microsoft.VisualStudio.DevShell.dll\"\"\"; Enter-VsDevShell a87bd8d7 }\""
}
I like to set the background explicitly for special prompts to remind me that I’m not in the usual environment.